
Introduction:
Have you ever wondered, “How can I keep my home safe without messy wires?” Wireless outdoor security cameras might be the answer! They give you the freedom to place cameras almost anywhere. Best of all, you can check your cameras right from your phone. This guide teaches you every step, from picking the right camera to advanced troubleshooting. Let’s get started! 🔍
1. Selecting the Right Camera
1.1 Camera Types: Battery, DC-Powered, 4G LTE
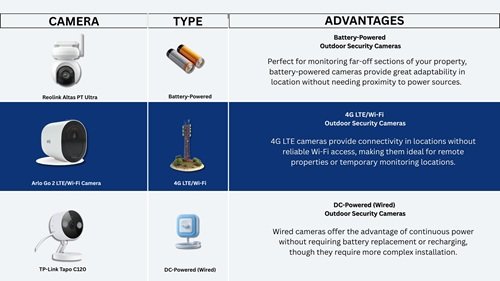
- Battery-Powered: There are no wires. It is easy to move, but you must recharge or swap batteries. It is good for tricky spots.
- DC-Powered: Uses a cable to an outlet. Less hassle changing batteries, but needs planning for cable routing.
- 4G LTE: Works like a phone using a SIM card. Perfect if you don’t have Wi-Fi or want a backup connection.
🛠 Tip: If you live in a spot with weak Wi-Fi, consider a 4G LTE model.
When choosing between battery-powered, DC, or 4G LTE cameras, it’s crucial to compare features and reliability. For detailed reviews and side-by-side comparisons, check out PCMag’s Best Outdoor Home Security Cameras for 2025. It’s a great roundup to help readers make smart purchases.
1.2 Key Features: Resolution, Night Vision, Field of View
- Resolution: Aim for at least 1080p HD. That way, you see clear faces and license plates.
- Night Vision: Infrared LEDs let you see in the dark. Some cameras switch to color if there’s a porch light.
- Field of View: Wide-angle (110°–130°) covers more space. Too wide, and objects may look distant.
👉 Question to Ask: Do you mostly need to see a porch or a whole yard? Adjust the view angle accordingly!
1.3 Network Considerations: Wi-Fi 2.4 GHz vs. 5 GHz, Signal Extenders
- 2.4 GHz: Longer range, but slower speed.
- 5 GHz: Faster, but doesn’t travel through walls as well.
- Signal Extenders: Boost weak Wi-Fi to reach farther corners.
❓ Is your router far away? Try placing an extender halfway between the router and the camera.
If your installation site suffers from weak Wi-Fi, consider an outdoor wireless bridge. FastCabling’s guide walks you through clever solutions to extend signal strength and ensure stable connectivity for your cameras.
2. Pre-Installation Planning
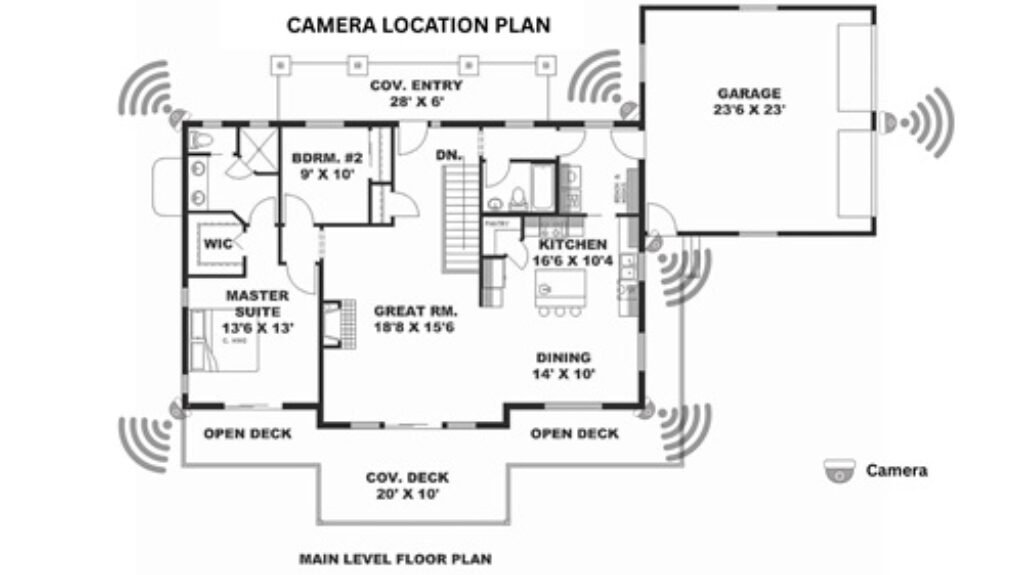
2.1 Assessing Coverage Area & Vantage Points
Walk around your property and note where you want coverage:
- Front door
- Backyard gate
- Driveway
- Side path
📌 Mark these spots on a simple sketch. It helps you plan cable runs and signal checks.
2.2 Legal & Privacy Tips
- Check Local Laws: Some areas require notices when recording public spaces.
- Respect Neighbors: Point cameras at your property, not your neighbor’s yard or windows.
- Signage: A small sign stating “Video Surveillance in Use” can deter intruders and keep you compliant with the law.
Camera placement isn’t just about angles—it’s about responsibility. Before installing, be sure to review the UK Government CCTV Guidelines to stay compliant with privacy laws and signage requirements. A small sign could make a big difference.
2.3 Tool Checklist & Safety Gear
- Drill with Bits (masonry bit for brick)
- Screwdriver Set
- Level (to keep cameras straight)
- Tape Measure
- Cable Clips or Conduit
- Safety Glasses & Gloves
👷 Safety First! Always wear eye protection when drilling and gloves to handle hardware.


3. Mounting Surface Preparation
3.1 Wood & Vinyl Siding
- Use a wood drill bit to pilot holes.
- Screw straight into studs or use strong wall anchors.
- Seal around screws with silicone caulk to keep water out.
3.2 Brick, Stucco & Concrete
- Use a masonry drill bit and hammer drill if possible.
- Insert plastic anchors into holes.
- Tighten screws into anchors firmly.
- Caulk around the mount plate to prevent leaks.
3.3 Metal & PVC Surfaces
- Metal: Pre-drill with a metal bit. Use self-tapping screws.
- PVC: Similar to wood—use anchors to avoid cracking.
3.4 Drilling & Weatherproof Sealing Techniques
- Always keep the drill level and steady.
- Wipe away dust before anchoring.
- After mounting, run a bead of silicone around the edges to seal gaps. 🌧️
4. Step-by-Step Installation
4.1 Marking & Leveling the Mounting Points
- Hold the mount bracket against the wall.
- Use a pencil to mark each hole.
- Check with a level to ensure it’s straight.
4.2 Drilling & Anchoring Hardware
- Drill pilot holes at the marks.
- Push anchors into holes until flush.
- Line up the bracket and screw it in firmly.
4.3 Securing the Camera Body
- Slide or clip your camera onto the bracket.
- Hand-tighten adjustment knobs—don’t overtighten and strip threads.
4.4 Hiding & Running Power/Data Cables
- Tuck cables into corner conduits or use flat cables under siding.
- Leave a small loop of cable near the camera for easy removal later.
4.5 Installing in Extreme Climates (Sun/Rain Shields)
- Many cameras come with sunshades or rain guards.
- If not, you can buy small plastic hoods to attach above the lens.
5. Connecting & Configuring
5.1 Powering Up
- Battery: Charge fully before mounting.
- DC Power: Connect to the included adapter.

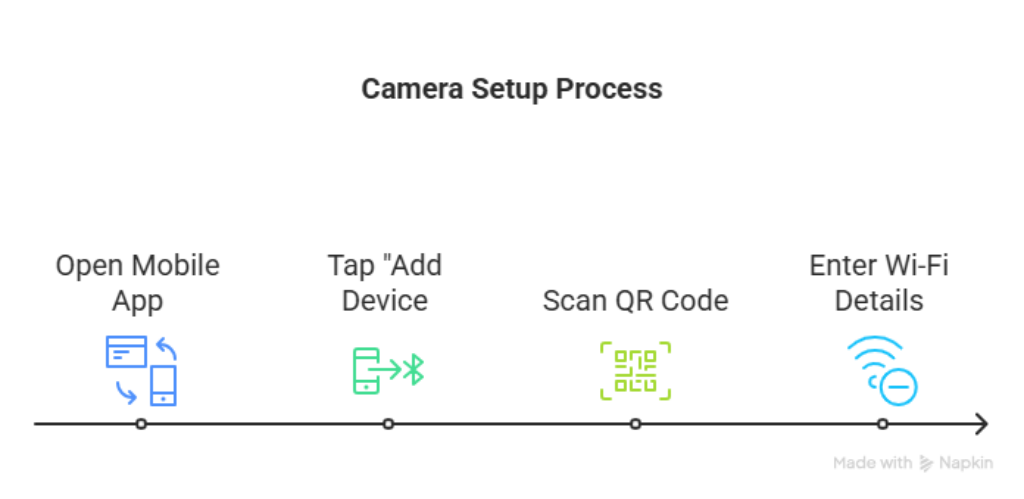
5.2 Wi-Fi Pairing & 4G Setup
- Open the camera’s mobile app.
- Tap “Add Device” and scan the QR code with the camera.
- Enter your Wi-Fi name and password (or SIM—APN details).
🤔 Trouble pairing? Move the camera closer to the router or use a temporary extension cord.
5.3 Mobile App Walkthrough
- Live View: See real-time video.
- Record: Schedule recordings or motion-triggered clips.
- Alerts: Customize push notifications.
5.4 Fine-Tuning Motion & Alert Settings
- Sensitivity: High picks up small movements—good for doors and windows.
- Zones: Set “no-go” zones (e.g., tree branches) to avoid false alerts.
6. Testing & Optimization
6.1 Live View & Recording Checks
- Watch in daylight and at night.
- Check if night vision flips on automatically.
6.2 Signal Strength & Range Tests
- In the app, view Wi-Fi signal bars.
- If below 2 bars, add an extender or move the router.
6.3 Adjusting Angles & Sensitivity
- Tilt the camera slightly downward to reduce glare.
- Pan left/right to center your main target (door, driveway).
7. Maintenance & Troubleshooting
7.1 Battery Care & Firmware Updates
- Battery: Replace twice a year or recharge monthly.
- Firmware: Update in the app when prompted for security and new features.
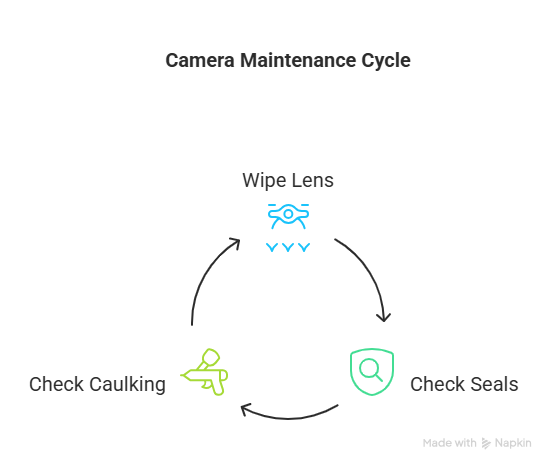
7.2 Seasonal Inspections & Cleaning
- Wipe the lens gently with a microfiber cloth.
- Check seals and caulking after winter storms.
7.3 Common Issues & Quick Fixes
| Issue | Fix |
|---|---|
| No video feed | Reboot camera, check Wi-Fi |
| Flickering night vision | Clean lens, remove obstructions |
| False motion alerts | Lower sensitivity, redraw zones |
7.4 When to Contact Support
If none of these steps work, contact the manufacturer’s help line. Keep your purchase date and model number handy.
8. FAQs
Q: How far can a wireless camera be from the router?
A: Up to 100 feet in open space on 2.4 GHz—but walls cut range.
Q: What’s the best height and angle?
A: Mount at 8–10 feet high, tilted at 20–30° for clear faces.
Q: Do wireless cameras work in sub-zero temperatures?
A: Many work down to –20 °C (–4 °F). Check your model’s specs.
Conclusion & Next Steps
Congratulations! You’ve learned how to:
- Choose the perfect wireless outdoor camera
- Plan, mount, and wire it safely
- Configure settings for crisp video and reliable alerts
- Maintain and troubleshoot like a pro
Now, you’re ready to guard your home with confidence.🔐
Ready to browse top-rated options? Explore A selection of wireless security cameras to compare specs, read reviews, and find models that fit your budget and needs.
Want more? Check out our guides on:
- Indoor Security Cameras
- Cable Concealment Tricks
- Advanced Home Automation Tips
Stay safe and enjoy peace of mind! 😊
Discover more about smart home security cameras with our AI Security Camera Guide